Tuesday, September 28, 2010

Spinach Cannelloni


My family LOVES spinach.  The boys like it because they immediately think of Popeye and how strong he is, and feel stronger after just one bite!  Whatever the reason, I'm just glad they eat their veggies.   I found this recipe in a pile of papers I had printed out.  As I see recipes online I tend to copy and paste to try at a later date.  I believe this came from the Clean Eating Magazine newsletter.  I tweaked it to our liking and this is what I came up with.  I hope you enjoy it.

Start a pot of water boiling and boil the lasagna sheets.  I got sheets instead of long noodles...you can use either one.  When they are ready, drain and lay out on a sheet to cool so that they do not stick together.


Melt 1 tablespoon of butter and adding 1 1/2 tablespoons of whole wheat flour, whisking for 2 minutes.  Add 2 cups low fat or soy milk (I used skim) and bring to a boil until sauce thickens.


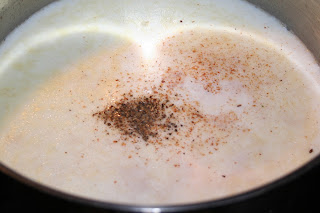
Reduce heat and simmer.  Add 1/4 teaspoon of salt, 1/4 teaspoon of pepper and a pinch of nutmeg.  I always use freshly grated nutmeg.  I have a jar of the nuts in the pantry that I take out and grate as needed.  It tastes so much better when you freshly grate it. 


Grate 1/4 cup of Parmigiano reggiano, add to the sauce and cover the pan.


Preheat the oven to 425 degrees.  Saute the spinach in a nonstick pan with 2 tablespoons of olive oil and a clove of minced garlic.

Combine 1 3/4 cup low fat ricotta, 1 egg (slightly beaten), 1/2 cup chopped fresh parsley, and 1/4 teaspoon of salt in a mixing bowl just until combined. 


Lay out the sheet and add sauted spinach to each sheet, about 2 tablespoons.  Add the ricotta mixture to the sheet as well.  I used a small scoop for this to make sure I had an even amount on each sheet.  (3 small scoops worked for me.)


Here are the other sheets.  I made sure I had enough in all of them before I started rolling them up.  That way if I was short on ricotta, I could scoop some from another sheet.  Luckily, it was just enough.


Coat the bottom of the buttered casserole dish with the sauce.  Roll up the lasagna sheets and place them in the dish seam side down.


Add remaining sauce to the top of the cannelloni and add 1/4 cup of freshly grated Parmesan cheese.  Bake covered with foil for 20 minutes.  Remove foil and place under the broiler for about 5 minutes, until lightly browned and bubbly.


Here it is out of the oven.  Let it cool about 10 minutes before serving.


Serve with whole wheat rolls.  Mmmmmm.....

Monday, September 27, 2010

Canadian-Bacon Strata


So this dish was just way to easy.  It is nice to have a recipe you can make the night before and leave in the refrigerator overnight.  Do pay attention, however, to how long it takes to bake!  I didn't pay attention and the kids couldn't wait and hour and a half to eat.  Guess what they are having for lunch?  

I absolutely love eggs benedict.  Usually I make it at home without the hollandaise sauce since it is so rich.  I saw this recipe and was happy to see another variation on my favorite breakfast!


Toast four English  muffins in the toaster and cut them in half.  Cut 10 slices of Canadian bacon in half as well.


 Arrange them in a buttered, 2-quart dish. 


Here is a close up.


Sprinkle with 1 1/4 cup of shredded cheddar cheese, and 1 cup of finely shredded Parmesan cheese.  

Whisk together 8 large eggs, 3 cups of milk, 4 1/2 teaspoons Dijon mustard, 1/2 teaspoon of salt, and a pinch of pepper.  (You can also add 1/4 teaspoon hot-pepper sauce if you like.)


Pour into dish, cover tightly with plastic wrap.  Refrigerate at least 2 hours or overnight.

When ready to bake, preheat oven to 425 degrees.  Bake on a large sheet pan until puffed and set in the center, about 1 1/2 hours.


Let stand 10 minutes before serving.


Here is my slice.  The picture does not do it justice!

Click Canadian-Bacon Strata Recipe for a printable version of the recipe from Martha Stewart's website.

Tuesday, September 21, 2010

Baked Corn Dogs and Homemade Baked Beans


Okay, I know those of you who know me cannot believe I made a corn dog...and honesty neither can I.  I was looking through some recipes and found this baked corn dog.  I knew the kids would love it, so I figured I would take one for the team!  I had never made baked beans before either.  I had no idea how simple it really is!  And I had no idea those are white beans in there!  I loved it.


So here is how the corn dog came to be:


Get your hot dogs on a stick!  I used Hebrew National hot dogs and cut down some wooden skewers so they weren't too long.  You can also use popsicle sticks.


Here they are all ready to go!


The batter is very easy, you just add all the ingredients and whisk.  (recipe link at the bottom of this post).


Roll each dog in some flour and shake off the excess.


Spoon batter onto the hot dogs and coat evenly.  (I'm not gonna lie, since it's baked the batter is thicker and you are going to have to spoon it on.)  Place the coated hot dogs on a sheet pan lined with parchment and sprayed with nonstick spray.

Bake at 375 degrees for 5 minutes.  Remove pan and reapply the batter that has slipped onto the sheet back onto the corn dog.  Continue to bake for 20 minutes until they are golden brown.  It was my first time doing this and I didn't read the REMOVE PAN AFTER 5 MINUTES part, so mine was a little crumbly and some had holes in them.  Nobody cared. 


Serve with all your favorite hot dog toppings:  catchup, mustard, whatever you like!


To make these for your family go to:

Baked Corn Dogs by Martha Stewart  for the corn dogs
 and
Speedy Baked Beans by Martha Stewart for the baked beans

It's something fun and the kids will love it.  So much healthier than the deep fried ones!

Monday, September 20, 2010

Grilled Lamb with Bulgur Wheat and Broccoli


I have been wanting to grill lamb FOREVER.  Why haven't I?  I was afraid to spend the money if I didn't know I could cook it well.  Last time I was loitering in the meat section at Costco, debating whether or not to get this rack of lamb, a man came buy and through them in the cart without a second glance.  I had to ask him how he cooks them.  He told me how he cooks them, and then said, "but my wife throws them on the grill and they are even better."  Okay, now I HAVE to buy them, right?  I actually didn't that day and regretted it until my next trip where I made a B-line to the lamb. 

I read through a lot of recipes and figured simplicity is best.  Olive oil, salt and pepper are all I used on this rack and put them on the grill.  I cooked them for about 5 minutes on each side.  I took them off the grill and sliced them.  They still looked very rare, so I put them on the grill and cooked for one minute on each side.  PERFECTLY medium rare, which is how my husband and I like or meat cooked. 


While all this is going on with the lamb, I made the bulgur wheat.  I found this Toasted Bulgur with Almonds in my Dinner at Home cookbook by Martha Stewart and have fell in love with it.  It is a fantastic side dish to accompany any meat or fish dish and it is just plain yummy.  


All you do is heat up a large skillet over medium-high heat, and add the bulgur wheat.  You toast it for about 5 minutes and then add stock, water, cinnamon, bay leaf and salt.  This boils and then simmers, covered for 10-12 minutes.  In another pan I toast almonds and then add them to the bulger when it is finished cooking.  Be sure to take out the cinnamon stick and bay leaf before serving.


These were so delicious.  If you are not a fan of medium rare, you can cook a minute or two longer.  But remember when the meat rests after cooking it will continue to cook a little bit, so don't over cook it. 


Here was my plate!  Enjoy!  Try it if you have never had lamb.  It is absolutely worth it!  My boys even loved it and had seconds.  (They are 5 & 9.  If they can try it, so can you!)  

Here is a link to the bulgur recipe:  Toasted Bulgur with Almonds by Martha Stewart

Sunday, September 12, 2010

Baked Alaska


I joined the Daring Bakers blog group in August.  They have a new recipe each month for people to try and blog about and compare notes.  For my first month the recipe was Baked Alaska!  I have never attempted this before and thought it would be fun!  Plus, I found that great Guinness Milk Chocolate Ice Cream recipe.

Here are the guidelines:
  • Use the Brown Butter Pound Cake recipe they provided (listed at the bottom of this post)
  • Make the ice cream from scratch (any kind you want) 
  •  

      Brown the butter until the milk solids are a dark chocolate brown and the butter smells nutty.


      (Don’t take your eyes off the butter in case it burns.) Pour into a shallow bowl and chill in the freezer until just congealed, 15-30 minutes.  I used an ice bath for the brown butter instead of freezing it. Whisk together cake flour, baking powder, and salt.


      Beat the brown butter, light brown sugar, and granulated sugar in an electric mixer until light and fluffy, about 2 minutes. Beat in the eggs one at a time, mixing well, and then the vanilla extract.  Stir in the flour mixture at low speed until just combined.


      Scrape the batter into the greased and floured 9 x 9 square pan.  Bake until golden brown on top and when a toothpick inserted into the center comes out clean, about 25 minutes.


      Cool in the pan 10 minutes. Run a knife along the edge and invert right-side-up onto a cooling rack to cool completely.


      Cut out four circles using a 1-cup prep bowl and serrated knife.


      I topped these pound cake circles with the Guinness Milk Chocolate Ice Cream that I prepared earlier.  Click on the link above for the complete ice cream recipe on this site.  I put the glass under running warm water and used a knife around the edge to remove the ice cream from the prep bowl.

      Meringue For the Baked Alaska
      8 large egg whites
      ½ teaspoon cream of tartar
      ½ teaspoon salt
      1 cup (220g) sugar

      Beat the egg whites, cream of tartar, and salt on high speed in an electric mixer until soft peaks form. Beat in the sugar gradually in a slow stream until stiff peaks form.


      Pipe the meringue over the ice cream and cake, or smooth it over with a spatula, so that none of the ice cream or cake is exposed.  Burn the tips of the meringue with a cooking blow torch.

      Serve immediately.
       
      The August 2010 Daring Bakers’ challenge was hosted by Elissa of 17 and Baking.

      Brown Butter Pound Cake
      Gourmet Magazine

      19 tablespoons unsalted (sweet) butter
      2 cups sifted cake flour (not self-rising; sift before measuring)
         (See “Note” section for cake flour substitution)
      1 teaspoon baking powder
      1/2 teaspoon salt
      1/2 cup packed light brown sugar
      1/3 cup granulated sugar
      4 large eggs
      1/2 teaspoon pure vanilla extract

      1. Preheat the oven to 325°F/160°C and put a rack in the center. Butter and flour a 9”x9” (23cmx23cm) square pan.

      2. Place the butter in a 10” (25cm) skillet over medium heat. Brown the butter until the milk solids are a dark chocolate brown and the butter smells nutty. (Don’t take your eyes off the butter in case it burns.) Pour into a shallow bowl and chill in the freezer until just congealed, 15-30 minutes.

      3. Whisk together cake flour, baking powder, and salt.

      4. Beat the brown butter, light brown sugar, and granulated sugar in an electric mixer until light and fluffy, about 2 minutes. Beat in the eggs one at a time, mixing well, and then the vanilla extract.

      5. Stir in the flour mixture at low speed until just combined.

      6. Scrape the batter into the greased and floured 9”x9” (23cmx23cm) square pan. Smooth the top with a rubber spatula and rap the pan on the counter. Bake until golden brown on top and when a toothpick inserted into the center comes out clean, about 25 minutes.

      7. Cool in the pan 10 minutes. Run a knife along the edge and invert right-side-up onto a cooling rack to cool completely.

      Wednesday, September 8, 2010

      Molten Chocolate Mini Cakes


      I had purchased my floral cupcake pan ages ago and FINALLY used it.  I started on a quest for a molten lava cake recipe for a friend and ended with Molten cupcakes.  These are awesome.  
      For all you boxed cake makers, give this recipe a try, it is super easy.


      Here is what my Silicone Cupcake Pan looks like.  Cute isn't it?  With a house full of boys, I rarely get to use it!  I was going to do these for bunco before I found the cute dice cake idea and recipes.  If you haven't seen my alcoholic cakes...check it out.

      Anyway, here is what you need to do:


      Spray the inside of your pan.


      Follow the recipe and put your pan into the oven to bake.  (recipe at the end of this post)


      Release cute molded cakes onto a large, round platter.


      Serve with your favorite ice cream and chocolate sauce.  (I love Trader Joe's Midnight Moo!)


      See how gooey they are inside!  Yum!

      Here is the recipe:

      The Pampered Chef ®
      Molten Chocolate Mini Cakes
      Recipe
       6 oz fine-quality bittersweet chocolate (60% cocoa) 
       1/2 cup (1 stick) butter (do not substitute margarine) 
       3 whole eggs 
       3 egg yolks 
       1 1/2 cups powdered sugar 
       3/4 cup all-purpose flour 
      Vanilla ice cream (optional) 

      1. Preheat oven to 400°F. Generously spray wells of Silicone Floral Cupcake Pan with nonstick cooking spray. Wipe off excess cooking spray from top surface of pan; set pan aside. Coarsely chop chocolate using Chef's Knife. Combine chocolate and butter in Classic Batter Bowl; microwave on HIGH 1-2 minutes or until chocolate is melted and mixture is smooth, stirring after each 30-second interval. Remove chocolate mixture from microwave; cool 5 minutes.
      2. Whisk eggs and egg yolks into chocolate mixture using Stainless Whisk. Add sugar and flour; mix just until dry ingredients are incorporated using Classic Scraper.
      3. Divide batter equally among wells using slightly mounded Large Scoop. Bake 13-14 minutes or until outside edges are set and center is still liquid. (Cracks will appear wet. Do not overbake.)
      4. Remove pan from oven using clean kitchen towel; immediately place inverted Simple Additions® Large Round Platter over pan. Carefully invert pan. Gently press on tops and sides of wells to loosen cakes. Slowly lift pan, checking to see that all cakes have released before lifting pan completely. Serve with ice cream, if desired.
      Yield: 12 servings